Category

Home Improvement

Category

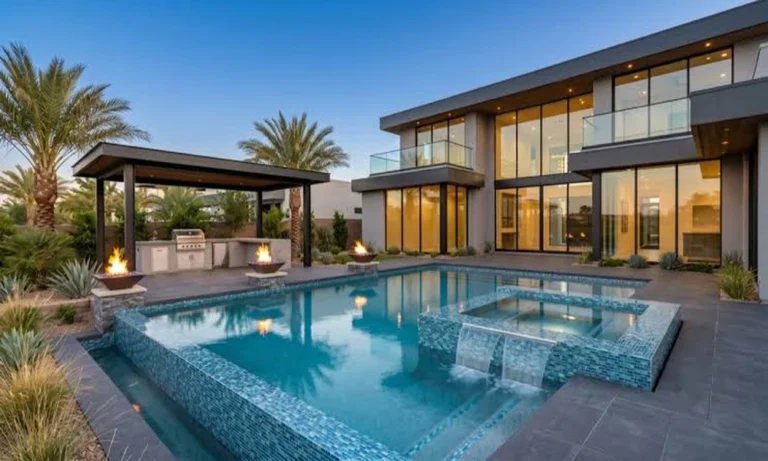
Most homeowners wait too long. They spend years looking at a beautiful pool, then realize the backyard has no shelter, no bathroom, no kitchen, and honestly no reason for guests to stay past 4 p.m. A pool house fixes all of that in one build. And in a market like Las Vegas, where outdoor living is practically a year-round sport, the financial case is nearly as strong as the lifestyle one.

This article breaks down what a pool house actually adds to your property, how to think through the design decisions that matter, and what separates a backyard structure that feels like a luxury from one that functions like one.

The Real Financial Case for Building Outback

Homeowners often assume a pool house is pure luxury spend. The numbers push back on that idea. A Zillow analysis of more than 2 million home sales in 2024, cited by HomeLight, found that listings with outdoor features such as an outdoor kitchen, shower, or TV sold for 3.1% more than expected. That’s not a trivial gap on a $600,000 Las Vegas property.

And if you pair the pool house with an existing or new pool, the value story gets even more specific. According to Nevada Real Estate Group’s 2026 buyer’s guide, which draws on over 9,600 Las Vegas metro closings, a private pool adds 4 to 8% to a home’s resale value when documented well and converts the backyard into roughly eight months of usable outdoor living. Add a proper pool house to that equation, and you’re not just improving the yard. You’re changing how buyers perceive the whole property.

That said, ROI isn’t the only reason to build. The better question is whether you’ll actually use the space. In Las Vegas, the answer is almost always yes.

What Makes a Pool House Actually Work

Here’s a distinction most contractors skip: a pool house that looks great in photos and a pool house that gets used every weekend are not always the same thing. The difference usually comes down to four decisions made early in the design process.

Purpose-first planning. Before choosing a roofline or a tile color, get specific about how the space will actually function. A structure built for Saturday afternoon entertaining needs very different infrastructure than one serving as a semi-permanent guest suite. Pick one primary use, then layer secondary features around it rather than trying to do everything at once.

Climate-smart design. Las Vegas summers are not forgiving. A pool house without adequate shade, proper ventilation, and energy-efficient materials will sit empty in July, which defeats the point. Covered overhangs, ceiling fans rated for outdoor use, and light-colored roofing materials are not optional upgrades here. They’re baseline requirements.

Plumbing and power, done right. A changing room with a shower and a half-bath is the single highest-impact feature you can add for the cost. It keeps wet feet and chlorine out of the main house, and it’s the first thing guests notice. Running dedicated electrical circuits for a mini-fridge, sound system, and exterior lighting is equally worth the early investment in conduit placement.

Style that matches the main house. A sleek modern pool house bolted onto the back of a Spanish colonial main home creates a jarring disconnect that buyers notice. The most successful builds treat the pool house as an architectural conversation with the primary structure, not a separate project.

The Pool House Decision Matrix

Before committing to a scope, run your plans through what I’d call a simple use-case filter. It’s not a formal checklist, but it consistently separates the builds that owners love from the ones they wish they’d done differently.

Primary Use Case Must-Have Features Optional Additions
Weekend entertaining hub Outdoor kitchen, bar, covered patio, half-bath Outdoor TV, fire feature, misting system
Guest suite / casita Full bath, sleeping area, kitchenette, separate entry Mini-split HVAC, smart lock, blackout shades
Changing room / equipment storage Shower, lockers, utility sink, pool equipment bay Towel warming drawer, outdoor speakers
Multi-generational living Full bath, dedicated bedroom, private entrance, full HVAC Washer/dryer hookup, expanded kitchen

The guest suite row is where the most interesting conversations happen in the Las Vegas market right now. Across Summerlin and similar planned communities, the standalone casita format has become one of the most sought-after residential features. In desirable master-planned communities like Summerlin and Henderson, homes featuring a well-appointed casita typically range from $750,000 to over $1.5 million, and in the luxury sector where casitas often serve as pool houses or elaborate guest villas, prices regularly exceed $2 million.

Summerlin Specifically: Why the Neighborhood Raises the Bar

If you own a property in Summerlin, you’re working in one of the most design-conscious residential environments in Southern Nevada. The community’s architectural review standards, its mountain backdrop, and its concentration of high-end buyers all mean that the quality of a backyard structure carries more weight than it would in a generic subdivision.

Picture a corner lot in The Ridges with a 400-square-foot pool house sitting awkwardly behind a 4,200-square-foot primary residence. It reads as an afterthought, and buyers price it that way. Now picture the same footprint done with matching stonework, a covered outdoor kitchen opening onto a resort-style pool deck, and a casita wing with its own private entrance. That’s a different conversation entirely, both at open houses and at the appraisal table.

Teams that specialize in custom casita construction in Summerlin approach these projects with that neighborhood-specific context in mind from day one, not as an afterthought during the permit phase.

“The casita remains one of the most practical and sought-after features in Las Vegas residential real estate,” noted analysis published by The Las Vegas Luxury Home Pro in early 2026, citing the continued growth of multi-generational living and remote work as the twin drivers of demand.

Five Things to Confirm Before You Break Ground

Skipping any of these early steps is where pool house projects quietly go sideways. Work through them in order.

  1. HOA approval and architectural guidelines. Most Summerlin villages have specific rules on structure height, setbacks, exterior materials, and roofline compatibility. Pull the CC&Rs before you finalize a design, not after.
  2. Permit scope and timeline. A pool house with plumbing and electrical requires separate permits from your pool permits. Clark County’s review timelines vary by project complexity, so build that buffer into your schedule.
  3. Utility connections. Determine whether your existing electrical panel can support the added load. Many mid-century Las Vegas properties need a panel upgrade before a pool house is wired properly.
  4. Contractor specialization. A general residential contractor and a team that builds backyard structures daily are not equivalent. Ask specifically how many pool house and casita projects they’ve completed in the last 18 months, and visit at least one completed job site.
  5. Future-proofing. Even if you’re building a simple changing room today, run conduit for future lighting and speaker wire while the walls are open. Retrofitting later costs two to three times as much.

What Actually Separates a Good Build from a Great One

The spec sheet rarely tells the story. Two pool houses with identical square footage and the same listed features can feel worlds apart depending on the quality of transitions, the material choices, and whether the layout was driven by how a person actually moves through the space or by what was easiest to frame.

Great builds treat the outdoor kitchen counter height as seriously as the indoor kitchen. They wire exterior outlets where you’d actually plug something in, not where the framer found it convenient. They spec ceiling fan mounting heights for a 9-foot covered porch, not a standard 8-foot interior room. These are the details that don’t show up in a quote comparison but define every afternoon you spend in the space.

Your Las Vegas backyard has somewhere between 280 and 300 days of genuinely usable outdoor weather. The NAR’s 2023 Remodeling Impact Report on Outdoor Features, analyzed by Opendoor in 2026, found that even standard lawn care returns 217% ROI at resale. A thoughtfully built pool house, designed for the specific way your household lives, returns something no spreadsheet captures: a backyard you actually want to spend time in.

So the real question isn’t whether you can afford to build a pool house. It’s whether you can afford to keep watching that empty concrete pad do nothing with 300 days of Las Vegas sunshine.

Arizona summers can make keeping your home comfortable a real challenge. When temperatures stay high for days at a time, your air conditioner has to work much harder to keep indoor spaces cool. Having reliable Air Conditioning for Arizona heat can make a big difference, but how you use and maintain your system matters, too.

There are also simple changes around the house that can help keep indoor temperatures down. From blocking direct sunlight to improving airflow and taking care of your AC system, a few practical habits can make hot days more manageable while helping your cooling system work more efficiently.

1. Keep Direct Sunlight Out

Arizona sunshine can quickly heat up rooms, especially those with large windows facing the sun. During the hottest part of the day, keeping sunlight out can reduce the amount of heat entering your home.

Try closing:

  • Curtains or blinds on sunny windows
  • Blackout shades in bedrooms and other warm rooms
  • Exterior shades or solar screens where practical

You don’t necessarily need to keep every window covered all day. Focus on windows receiving direct sunlight during the afternoon, when outdoor temperatures are often at their highest.

2. Check Your AC Filter Regularly

Your air conditioner’s filter plays a simple but important role in airflow. When it becomes packed with dust and debris, air may not move through the system as easily.

A restricted filter can make your AC work harder and may reduce airflow from your vents. Check the filter regularly and replace or clean it according to the manufacturer’s recommendations. Homes with pets, dust, or frequent AC use may need more frequent filter changes. If you’re unsure how often yours should be replaced, check the filter itself and follow the guidance provided for your particular system.

3. Use Ceiling Fans to Improve Comfort

Ceiling fans don’t actually lower the temperature of a room, but they can help you feel cooler by moving air across your skin. During hot weather, make sure your ceiling fans are rotating in the direction recommended for cooling. You can also turn fans off in rooms that aren’t being used. There’s little benefit in running them in an empty room because fans cool people rather than the air itself. Using fans alongside your AC can make occupied rooms feel more comfortable without relying entirely on lower thermostat settings.

4. Seal Gaps Around Doors and Windows

Cool air can escape through small gaps around doors and windows, while hot outdoor air can make its way inside. This can make it harder for your AC system to maintain a comfortable indoor temperature.

Check for visible gaps around:

  • Exterior doors
  • Window frames
  • Garage entry doors
  • Areas where pipes or cables enter the home

Weatherstripping and caulk can help seal some small openings. If you notice larger gaps or problems with the home’s insulation, a more thorough inspection may be worthwhile.

5. Avoid Adding Extra Heat Indoors

Some everyday activities can add unnecessary heat to your home. During the hottest part of the day, consider changing when and how you use appliances that produce heat.

For example:

  • Cook outside when practical
  • Use a microwave instead of a large oven for smaller meals
  • Run the dishwasher later in the evening
  • Avoid using heat-producing appliances unnecessarily during peak afternoon temperatures

These small changes won’t replace your AC, but they can reduce the amount of heat your system needs to remove.

6. Keep Your AC Vents Clear

Furniture, curtains, rugs, or other objects can block supply and return vents. When airflow is restricted, your cooling system may not distribute conditioned air as effectively. Walk through your home and check that vents aren’t covered or blocked. Keep furniture a reasonable distance away from them so air can circulate freely.

If one room consistently feels much warmer than the rest of the house, don’t simply assume the thermostat is the problem. Blocked vents, airflow issues, insulation, or other factors could be contributing to the uneven temperature.

7. Give Your AC System Some Attention

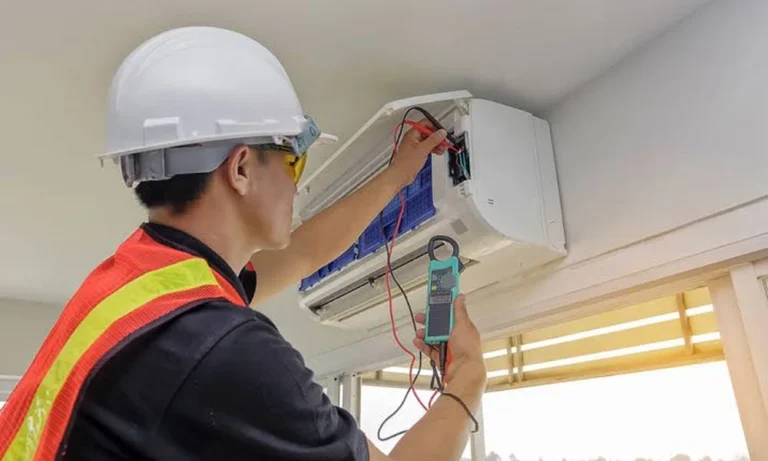
Extreme Arizona heat puts a lot of demand on an air conditioner. Regular maintenance can help you spot potential problems before they leave you without cooling during the hottest part of the year.

Pay attention to signs such as:

  • Weak airflow from the vents
  • Strange noises or unusual odors
  • Rooms that aren’t cooling properly
  • An AC that runs constantly without reaching the set temperature
  • Unexpected increases in energy use

These signs don’t always mean the system is about to fail, but they shouldn’t be ignored. Getting an issue checked early can be easier than dealing with a complete loss of cooling during extreme heat.

8. Use Your Thermostat Wisely

Setting your thermostat to an extremely low temperature doesn’t necessarily cool your home faster. It can simply make the system run longer as it tries to reach an unnecessarily low setting. Choose a temperature that feels comfortable and suits your household. When you’re away for several hours, you can adjust the setting rather than cooling an empty house to the same level you would use when you’re home. A programmable or smart thermostat can also make temperature adjustments easier, particularly if your daily schedule is fairly predictable.

Final Thoughts

Keeping your home cool during extreme Arizona heat takes a combination of good AC use and a few simple changes around the house. Closing blinds during the hottest part of the day, keeping vents clear, changing dirty filters, sealing gaps, and reducing indoor heat can all make it easier to maintain a comfortable temperature.

Your air conditioner will still do most of the work, especially when outdoor temperatures climb into the triple digits. Regular maintenance and paying attention to signs such as weak airflow, strange noises, or rooms that aren’t cooling properly can also help you deal with problems before they become more serious. With a little preparation and the right cooling habits, you can make your home more comfortable throughout the hottest months of the Arizona summer.

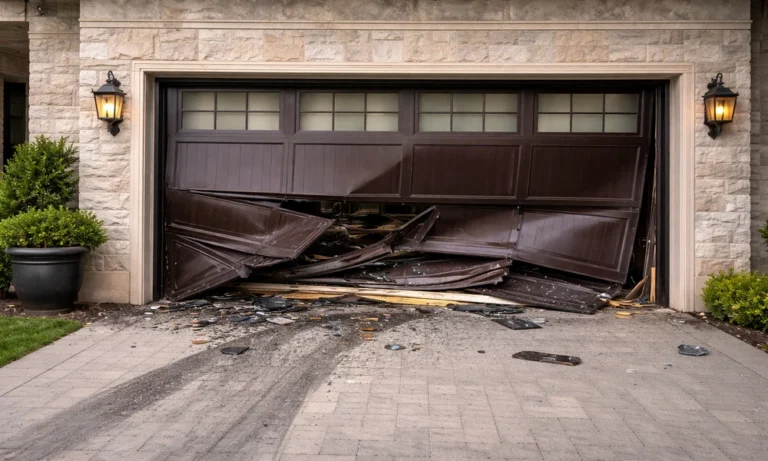
A garage door that refuses to open or close at the worst possible moment can bring your entire day to a halt. From safety concerns to sheer inconvenience, figuring out what went wrong and how to fix it is essential for every homeowner.

Why Your Garage Door Won’t Open or Close Properly

The signs are rarely subtle. Maybe the door only moves halfway, groans loudly, or simply remains stuck. Intermittent issues can be just as frustrating. Sometimes the remote works, sometimes it does not, and other times the wall switch seems to have a mind of its own.

Common Symptoms of Garage Door Malfunctions

– Door won’t respond to remote or wall switch

– Door reverses direction before closing

– Motor runs, but door does not move

– Unusual grinding or squealing noises

– Door closes unevenly or sticks halfway

Typical Causes Behind Garage Door Problems

Most problems trace back to a handful of culprits: power issues, faulty sensors, damaged tracks, worn springs or cables, or a failing opener motor. Narrowing down the cause is the first step toward a solution.

Diagnosing the Issue: Step-by-Step Troubleshooting

Pinpointing the root cause saves both time and money. A systematic approach starts with the simplest possibilities and works toward the more complicated ones.

Checking the Power Source and Remote Controls

First, confirm the opener has power. Is the outlet working? Try plugging in another device. Check remote batteries and ensure you’re within range. Sometimes, a tripped circuit breaker or a loose wire is the only issue standing between you and a functioning door.

Inspecting the Garage Door Sensors and Safety Features

Modern garage doors rely on safety sensors. If something blocks them, or if they’re misaligned, the door won’t budge. Gently wipe the lenses and make sure both sensors face each other with indicator lights illuminated.

Evaluating the Door Tracks and Rollers for Obstructions or Damage

Over time, tracks can bend, accumulate debris, or shift out of alignment. Visual inspection is key here. Look for dirt, physical damage, or rollers that struggle to glide smoothly.

Testing the Garage Door Springs and Cables

Broken or stretched springs are dangerous to handle and can prevent the door from moving at all. Similarly, frayed or snapped cables will disrupt normal operation.

Assessing the Garage Door Opener Motor and Mechanism

If power, sensors, tracks, and springs all check out, listen to the motor. If it runs but the door does nothing, the drive gear or chain may need attention.

Solutions to Common Garage Door Problems

Some fixes are simple enough for a careful homeowner, but others warrant professional service.

Fixing Power and Remote Control Issues

– Replace remote batteries.

– Reset the opener by unplugging it for a minute.

– Reset tripped breakers.

Realigning or Cleaning Sensors and Safety Eyes

– Remove obstructions and clean lenses.

– Gently realign sensors until both indicator lights glow steadily.

Repairing or Replacing Damaged Tracks and Rollers

– Use a soft brush or cloth for cleaning.

– Tap misaligned tracks gently back into place.

– Replace bent tracks or seized rollers as needed.

Handling Broken Springs and Worn Cables Safely

This is the territory where DIY can get risky. Broken springs are under tremendous tension and can cause serious injury. If you spot a gap in the spring or a cable that’s unraveling, call a professional immediately.

Troubleshooting and Repairing the Opener Motor

– Inspect the chain or belt for slack.

– Listen for grinding noises (a sign the gear may be stripped).

– Refer to the opener’s manual for reset instructions.

When to Call a Professional Garage Door Technician

There’s a line between simple fixes and problems that demand expertise. Broken springs, cables, or opener gears should never be tackled without training and tools.

Identifying Problems Beyond DIY Repairs

If the door is off its tracks, if any component shows significant wear, or if you’re simply unsure, it’s wise to seek out expert help.

Importance of Professional Safety and Expertise

Garage doors can weigh hundreds of pounds, and repairs sometimes involve high-tension parts. The right technician ensures safety and long-term reliability.

How to Choose a Reliable Garage Door Repair Service

Ask about experience, reviews, and emergency availability. Companies like Door Doctor have decades of experience across residential, commercial, and industrial doors, providing both routine and emergency repairs.

Preventive Maintenance Tips to Keep Your Garage Door Running Smoothly

A little attention prevents most headaches.

Regular Inspection Checklist

– Check tracks and rollers for debris or wear.

– Test auto-reverse feature monthly.

– Inspect cables and springs for signs of wear.

Lubrication and Cleaning Best Practices

Apply silicone-based lubricant to rollers, hinges, and springs every six months. Wipe down tracks, avoiding oil buildup.

Seasonal Maintenance Recommendations

In colder climates, clear ice or snow around the door. Inspect weather stripping and tighten all visible hardware.

Emergency Garage Door Repairs: What to Do When You’re Stuck

Sometimes, you need to secure your garage or regain access quickly.

Temporary Fixes to Secure Your Garage

Engage the manual release lever to open or close the door by hand (if safe), and padlock the track as a temporary security measure.

How to Access Emergency Repair Services Quickly

Keep the number of a reputable service handy. Many offer 24-hour emergency response, minimizing downtime and risk.

Final Steps: Testing and Ensuring Proper Garage Door Functionality

Never walk away from a repair job without double-checking everything.

Running Diagnostic Tests After Repairs

Operate the door several times using both the remote and wall switch. Make sure it opens and closes smoothly, without jerking or odd noises.

Safety Checks Before Regular Use

Test the auto-reverse sensors with a block of wood in the door’s path. Only resume normal use once every safety feature works as expected.

A reliable garage door is more than a convenience; it’s a safeguard for your home and family. Whether you fix a minor issue yourself or call in the experts, staying proactive saves frustration and ensures your garage door never leaves you stuck.

Surface preparation matters because bedroom paint needs a clean, dry and even base to settle properly. It also stops cracks, stains and rough patches from showing through the finished colour.

A bedroom may have attractive shades, yet the result can still look untidy when the wall underneath has not been treated. Inspection, repair, sanding and priming should come before the final coat.

Inspect Every Wall Carefully

Check the walls in daylight, including corners, areas behind furniture and sections near windows or attached bathrooms.

Look for loose paint, hairline cracks, nail holes, powdery patches, damp marks and uneven plaster. Each issue needs separate attention. Painting directly over them may leave bumps, visible lines or recurring stains.

Deal with Dampness before Painting

Moisture should be traced to its source before cosmetic work begins. A damp wall is not ready for putty, primer or paint.

While arranging painting services, request a wall assessment before colour selection and application. The inspection can help identify whether a mark is caused by seepage, leakage, poor ventilation or an old coating. Corrective work should be completed, and the wall allowed to dry, before the next stage.

Remove Weak Paint and Surface Dust

A fresh coat cannot form a sound base over paint that is already peeling or chalking. Loose material must be scraped away.

After scraping, sand the surface to soften raised edges. Dust left behind can interfere with the next layer, so wipe the wall clean. Protect switchboards, flooring, wardrobes and fixed fittings before this work starts.

Repair Cracks and Uneven Patches

Wall repair should be completed in stages. Filling every defect at once without checking depth or drying may create fresh ridges.

The preparation may involve:

  • Opening and cleaning visible cracks
  • Filling dents, holes and low areas
  • Sanding repaired portions evenly
  • Removing dust before primer
  • Checking that the surface is dry

Inspect the repaired wall from the side. Angled light often reveals waves and rough patches that are difficult to notice from the front.

Test Colours on the Prepared Wall

Shade testing is more useful after stains, old colours and patchy areas have been covered with a suitable base.

When planning a bedroom wall colour combination, apply the shortlisted shades on different walls. Light near a window may make a colour appear cooler or brighter, while a shaded wall can deepen the same tone. Check samples beside the flooring, wardrobe and curtains before approval.

Apply Primer for an Even Base

Primer helps create a uniform surface before the finishing coats are applied. It can reduce uneven absorption across repaired and untouched areas.

The primer should be compatible with the wall condition, putty and chosen paint. Allow it to dry as directed, then inspect the surface again. Any remaining dents or sanding lines should be corrected before colour application.

Choose a Suitable Interior Product

Nerolac Beauty Smooth Finish may be considered where a smooth matt interior finish is preferred for bedroom walls. Its relevance comes after preparation, since interior emulsion cannot replace crack repair, moisture treatment or priming. The selection should reflect the desired finish and maintenance needs.

Final Thoughts

Surface preparation supports cleaner colour, better adhesion and a more even bedroom finish. Inspect the walls, correct dampness, repair defects, sand carefully and prime before painting. Once the base is stable, the chosen colours can be judged and applied with fewer visible interruptions.

A successful home upgrade depends on choosing the right professional who can manage planning, materials, and execution with precision. Homeowners expect structured coordination, steady progress, and dependable outcomes when a renovation project begins. Early choices strongly shape the final living space. Careful selection reduces uncertainty and supports a more controlled improvement process.

The process becomes easier when expectations are clearly defined and supported by proven expertise. A dependable professional brings structure to design, scheduling, and materials while keeping workflow aligned. Below are key factors to identify a trustworthy partner for residential improvement work and what homeowners should evaluate before deciding.

Verified Project Experience and Work Presentation

A strong background in completed assignments shows the ability to manage different types of residential spaces with accuracy. Reviewing past outcomes helps homeowners understand detailing quality, spatial planning, and finishing consistency. A well-documented work sample, such as a Story Hill Rennovations portfolio, can reflect practical experience across varied design requirements and demonstrate reliability in execution standards. This gives a clearer picture of how similar spaces have been handled with structured methods and practical coordination.

Work Scope Diversity

The range of completed assignments indicates flexibility in handling kitchens, bathrooms, and full home upgrades. It also highlights the ability to adapt techniques based on material type and layout complexity. A wider scope builds confidence in managing different homeowner expectations without disruption.

Execution Consistency Check

Consistency across multiple projects shows discipline in maintaining standards. It also reflects attention to finishing details and alignment with planned design outcomes. This factor helps distinguish organized professionals from inconsistent service providers.

Proper Authorization and Safety Standards

Legal authorization ensures that renovation work follows required building codes and safety regulations. A reliable professional maintains updated permissions and follows structured procedures for each stage of execution. This approach minimizes structural risks and supports compliance with local construction expectations. It also strengthens accountability throughout the entire improvement cycle.

Clear Communication and Planning Structure

Strong coordination ensures that every stage of work remains aligned with homeowner expectations. Structured communication helps avoid confusion and keeps all decisions transparent from start to finish. Regular updates ensure progress remains visible and manageable across different phases.

Milestone-Based Tracking

Breaking the project into stages allows easier monitoring of progress. Each milestone represents a completed phase with measurable outcomes. This helps maintain clarity and keeps timelines under control.

Decision Flow Coordination

A clear decision process ensures that material selection and design changes are handled without delays. It also supports smoother collaboration between planning and execution teams. This structure reduces misalignment during active work phases.

Transparent Cost Planning and Agreement Clarity

Clear financial planning helps establish trust and reduces unexpected adjustments during execution. A dependable professional provides a structured estimate covering materials, labor, and additional requirements. Written agreements ensure that all expectations are documented and understood before work begins. This supports better budget control and smoother decision-making throughout the process.

On-Site Coordination and Quality Review Practices

Active supervision ensures that each stage of work follows planned specifications with precision. Regular inspections help maintain alignment in measurements, material placement, and finishing standards. A structured review system reduces errors and strengthens overall output quality. An example like a Story Hill Rennovations portfolio often shows how disciplined oversight contributes to consistent results across different residential improvements. Such structured execution ensures that the final space aligns closely with the original vision while maintaining long-term reliability.

Selecting a dependable professional for home improvement work plays a major role in shaping both process and outcome. Careful attention to experience, communication systems, and execution methods helps create a smoother project journey. Structured planning and transparent coordination further support clarity at every stage. With the right evaluation approach, homeowners can achieve well-balanced results that enhance both function and overall living quality.